How to build/compile your game using FPSC x9 if error occurs:
*May be possible with x10 version if needed, though not tested.
Additional Info and Thanks to: Errant AI, Chidem and Lee B.
Breakdown:
The method below is an oppitional way of building your games if you incounter problems during the build process, and one I have used with great success.
Build problems occur due to the 2gb memory limit. And unless there is ever a way around it, the following guide will give you that option to seeing your game built.
In alot of cases, variety of media is mixed between levels, however if you are using the same media over and over (that is visible in lvl 1 & 2)
then skip to - section. 2.1 and 4.1
Planning:
1.1
When starting a new game, I suggest to make a written list of every entity and segment used (Guns etc.). Also including the folder directory in your notes. This will help speed the process later.
*Tip 1: check over notes not to include a entity or segment twice, even though it will not matter. It will save building space.
*Tip 2: the greater amount of lights placed in each level and map distance used will use more memory during build process. This is of no concern, however you may need to build levels seperate rather than in groups. Groups only help you complete the task faster.
Build Game Process:
2.1
Build levels seperate or if possible in groups of 2-4.
Using different build names. IE: ???1, ???2 etc.
*Tip 1: The option I used was to list each level number in the build title. RS123, RS45, RS678 etc. (this will help alot, unless you make detailed notes of what levels are in each build folder.)
*Tip 2: if you find you get a Build error with 3 levels in one Build,
then reduce the amount of levels to 2 etc.
2.2
Create a folder in your MapBank folder or on your Desktop titled 'GAMEBUILD' or something you will remember.
Copy each Build folder into this new folder.
I suggest to keep the original build folders seperate in case you make an error during the compile process, you will not need to re-build the level or files in question if a problem occurs.
Tip 1: Make sure to always rename the new build and not copy over a premade one. otherwise you'll have to repeat the process.
2.3
Once you have made all the required build folders, and made copies of these Builds into your new folder. You can start the next process.
ImageBlock File Build:
3.1
Depending if you have made you game levels prior to reading this.
Reload up all you saved maps for your game, 1 by 1. With a pen and paper, copy down all segments and entities used (including guns,characters etc.)
However you do not need to include cutters, lights and place markers.
*Tip 1. Refer to section 1.1 if you have not started your Game yet.
*Tip 2. Keeping a list helps you not forget something which will result in making the ImageBlock Build again or adding a Entity or Segment twice.
Refer to section 5.1 If you find a entity in game without a texture.
*Tip 3. Make everything Static, including Doors, Characters etc.
3.2
Once you have your list of game assets. Start a new fresh map in the editor. And save this as ????IB1 etc.
Not following any form of level design. Start by adding segments first. only need to place 1. making sure that at least one wall/floor is used or shown in the editor.
Then place all your required entities.
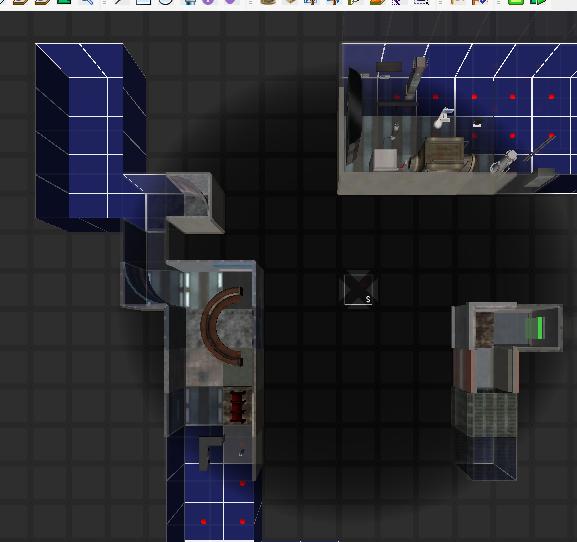
*Tip 1: Depending on quanity of your Entities and Segments, you may need to split these up into 2 or more new maps. Making sure not to exceed the 2gb memory etc. for each or the overall map/s Build.
The successful build test for this thread had 7 pages pages of assets broken down into 3 maps and this Built fine with no error.
3.3
Once you have a complete Build, including all the maps with your assets. Copy the ImageBlock Build folder into your New Folder containing
your other Build folders for your maps.
Compile your game:
4.1
Dont touch the ImageBuild folder yet.
Also your first Build folder of your maps (level 1 etc.) is going to be your main folder. The level structure and files keep the same.
*Tip 1, Do not copy/replace any files at any point during this process.
*Tip 2, When asked to Merge folders, Click yes to all. When asked to Replace click skip or no.
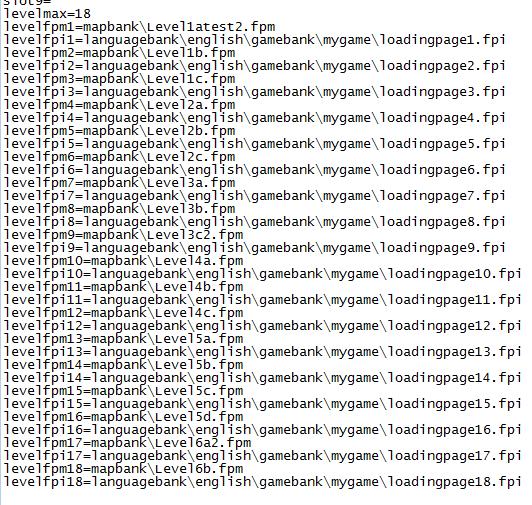
In this folder, Open the Setup file (notepad). At the bottom you will see the following.
levelmax=2
levelfpm1=mapbank\Level1.fpm
levelfpi1=languagebank\english\gamebank\mygame\loadingpage1.fpi
levelfpm2=mapbank\Level2.fpm
levelfpi2=languagebank\english\gamebank\mygame\loadingpage2.fpi
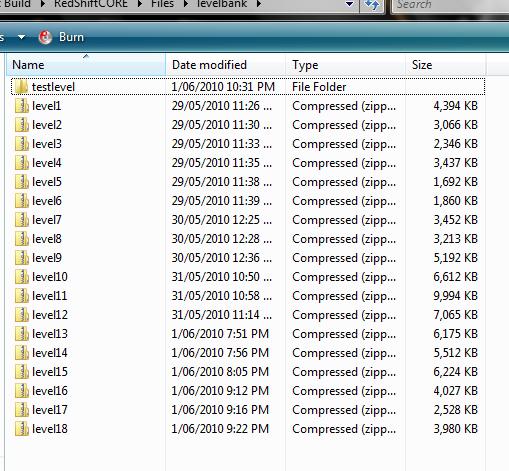
Also, click on Files/levelbank: You will see Ziped files.
Level1.zip
Level2.zip
4.2
Open the next (in order) Build folder and go to the following.
Setup File;
Copy and paste the level structure.
levelfpm1=mapbank\Level3.fpm
levelfpi1=languagebank\english\gamebank\mygame\loadingpage1.fpi
levelfpm2=mapbank\Level4.fpm
levelfpi2=languagebank\english\gamebank\mygame\loadingpage2.fpi
and change the number for the LEVEL MAX,FPM,FPI and LOADING PAGE so it looks like the following;
levelmax=
4
levelfpm1=mapbank\Level1.fpm
levelfpi1=languagebank\english\gamebank\mygame\loadingpage1.fpi
levelfpm2=mapbank\Level2.fpm
levelfpi2=languagebank\english\gamebank\mygame\loadingpage2.fpi
levelfpm3=mapbank\Level3.fpm
levelfpi3=languagebank\english\gamebank\mygame\loadingpage3.fpi
levelfpm4=mapbank\Level4.fpm
levelfpi4=languagebank\english\gamebank\mygame\loadingpage4.fpi
 4.3
4.3
Rename each level.zip in the other build folders to there required level numbers or order.
Level3.zip
Level4.zip
Copy the new renamed Level zips into the levelbank folder of the main Build folder.
*Repeat this process, depending on how many levels/Build folders you have.
 4.4
4.4
Open the Files/LanguageBank/English/Gamebank/MyGame and locate the LoadingPage.fpi files.
Rename these files before you move them, to the required level number.
(example say the Build folder is named - Level456. Then the Loadingpage1.fpi will need to be renamed Loadingpage4.fpi and so on.
Make sure to copy over all of these renamed files into the main Build folder. keeping to the same file structure.
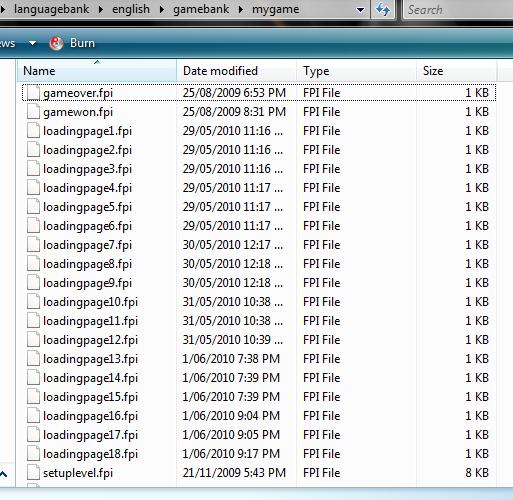
Tip 1: These images are added with your level selection process before you build your game. And create the following .fpi file. If you get it wrong and different image may appear. Refer back to your original Build folder kept in FPSC/MyGames folder in a problem occurs.
4.5
Now as suggested above, to not replace any files. Start to copy over files from the ImageBlock Build folder, into your now compiled game Build folder.
1. AudioBank
2. EffectBank
3. MeshBank
4. ScriptBank
5. SkyBank
6. TextureBank
Open Gamecore, and only copy everything except the backdrops folder.
If it does not copy/paste anything, dont worry.
Open up the Backdrops folder and make sure to copy over the levelloading images and anything that may have been missed. Best to do this one file at a time.
Open LanguageBank, and also do the same as Gamecore, just check files one by one. and see if your missing anything. Make sure to check HUDS if you have added a custom Hud etc. And paste the files needed if so.
4.6
In the main Build folder of your Game. (that you have added all the following files to.) You will see a file; Imageblock file. Located under the Files folder.
Delete this file.
Then open the ImageBlock Build folder and copy and paste the ImageBlock file into your Game Build folder.
Finished Compile:
5.1
Now that everything has been added to your Main Build Folder, everything
should be fine to load, run and play.
*If you find a Entity in game with no texture or a missing gun/AI etc. Then you have not placed it into the ImageBlock Build map somewhere.
This will give you 2 options.
1. Re-Build the ImageBlock build, including the required asset.
2. Re-Edit the Level containing the Asset and just Build that level and extract the Level.zip from that Build and place in you Main Build folder.
If done correctly, you will then have your game complete. I suggest do a small test to try it out first.
Good luck to all, and if there is any questions I will try my best to work it out. Also if something needs more info or I missed something let me know, and I'll adjust it as needed.
*screens posted below for above images.
CHANGING SKYBOX PER LEVEL - BASED ON DAVY B'S GREAT TUT.
Link to Davy B's Tut found here. Dated June '07.
http://forum.thegamecreators.com/?m=forum_view&t=108343&b=23
Below is the following adjustments to work with version v1.15. Due to some code being removed in later versions. Not tested with later versions.
Launguagebank / english / gamebank / mygame and open setuplevel.
At the top you will see the following.
; Setup Level Stats
:state=0:sky=skybank\kenji\Gas
:state=0:music=audiobank\misc\checkpoint.wav,musicvolume=50,soundscale=25
:state=0:fog=1,fogred=0,foggreen=0,fogblue=0
:state=0:ambience=8,ambiencered=255,ambiencegreen=255,ambienceblue=255
*Note sky= is the selected skybox for the first level. Change the sky if need be for the 1st level.
*Also note, that :state=0:state=1 is no longer present.
Now all you need to do, is copy the above script text and copy into
your LoadingPage___ .fpi. Example below for level 12.
LoadingPage12.fpi
;AIScript from Wizard
;Header
desc          = Loading Page Wizard
;Script
:state=0:music=
:state=0:backdrop=gamecore\backdrops\Kenji\level12load.jpg
:state=0:hudreset,hudx=50,hudy=50,hudimage=,hudmake=display
:state=0:hudreset,hudx=50,hudy=95,hudimage=gamecore\huds\loadingbarbox.tga,hudmake=display
:state=0:hudreset,hudx=50,hudy=95,hudimage=gamecore\huds\loadingbar.tga,hudhide=1,hudtype=1,hudmake=internal
:state=0:state=1
; Setup Level Stats
:state=1:sky=skybank\kenji\Sea
:state=1:music=audiobank\misc\checkpoint.wav,musicvolume=50,soundscale=25
:state=1:fog=1,fogred=0,foggreen=0,fogblue=0
:state=1:ambience=8,ambiencered=255,ambiencegreen=255,ambienceblue=255
:state=1:state=2
Hope that helps, more info in Davy B's thread, which I suggest anyone interested in doing this, reads first. Enjoy.
