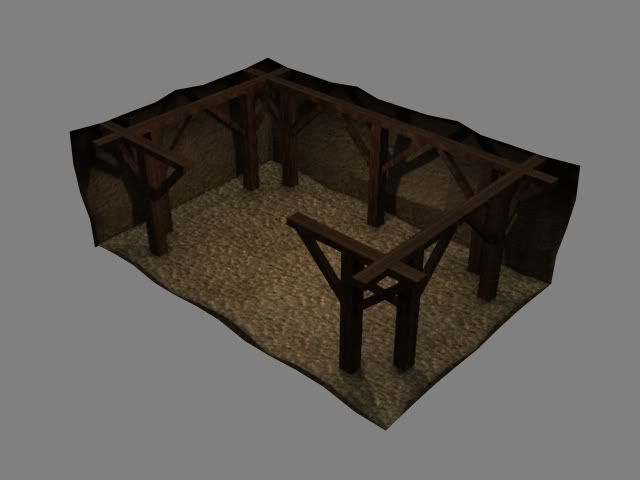
Level Tile set Creation ---- V1.0
(Version Notes: First draft, will add more tile creation at a later date)

Bualder's Gate for the PS, Dungeon Siege for the PC, even World of Warcraft for the PC use tiles to create vast terrain and dungeons for their game. The way it works is simple, and can be made to look as complex as you want. In this tutorial i want to show you a basic way of creating tiles for a cave mine like setting. I'll show you how to make a floor, wall, corner, and wall detail tile in order to create a very simple level.
Floor Tile-----
For are first tile, we'll create a floor tile. I'm useing truespace, but you can use any modeling program out there. I'm just showing the creating method, nothing special is used that isn't in any other program.
http://i23.photobucket.com/albums/b353/MoondogWiz/tl_tut001.jpg
First we create a plain, 10 units x 10 units.
http://i23.photobucket.com/albums/b353/MoondogWiz/tl_tut002.jpg
Then we break it up into 4x4 sections. We do this so we can edit the tile to look rocky.
http://i23.photobucket.com/albums/b353/MoondogWiz/tl_tut003.jpg
Now, we edit the verts. When doing so in a tile that needs to be seamless in all directions, the trick is when editing a vert on an outer edge, edit the vert on the opposite outer edge. This is so we don't end up with any holes. Also, if your going to move the outer corner verts, you must move them all at once, to prevent holes.
http://i23.photobucket.com/albums/b353/MoondogWiz/tl_tut004.jpg
Heres a picture of the outer verts edited.
http://i23.photobucket.com/albums/b353/MoondogWiz/tl_tut005.jpg
Now, edit the verts in the center to give it more detail. You can move any non-outer edge vert anywhere, as long as it stays within the outer edges.
Here it is with the floor seamless texture. See attached file for textures used in this tutorial.
http://i23.photobucket.com/albums/b353/MoondogWiz/tl_tut007.jpg
heres 4 tiles put together, as you can see, they are pretty seamless. Now if you wanted to, you could add more detail, even add some little rocks and maybe water peddles, up to you to how much detail you want.
Wall Tile---
Now lets build the main wall tile.
http://i23.photobucket.com/albums/b353/MoondogWiz/tl_tut008.jpg
Lets create a plane object and rotate and move it so it lines up with one edge of the floor.
http://i23.photobucket.com/albums/b353/MoondogWiz/tl_tut009.jpg
Then like the floor tile, divide by 4x4, so we can add detail.
http://i23.photobucket.com/albums/b353/MoondogWiz/tl_tut010.jpg
Now, for the wall, you just have to move the opposite verts of the left and right outer edges. The top and bottom edges of the wall can be as eratic as you want. As long as they don't go passed the left and right outer edges, and it looks better if the bottom verts go passed the floor tile so there are no holes.
http://i23.photobucket.com/albums/b353/MoondogWiz/tl_tut011.jpg
Heres are finished wall after moveing the center verts around, and adding the wall texture.
Corner Tile----
Save your progress

Now save as a different file, so we can build a corner tile out of the wall.
http://i23.photobucket.com/albums/b353/MoondogWiz/tl_tut012.jpg
First, take the wall file, copy it, and rotate to a perpendicular side.
http://i23.photobucket.com/albums/b353/MoondogWiz/tl_tut013.jpg
Next, attached the two wall objects together as one object.
http://i23.photobucket.com/albums/b353/MoondogWiz/tl_tut014.jpg
Then simply weld the outer edge verts at the corner, closeing it together. You'll then have to move the corner verts in to cover any holes that it makes with the floor tile.
Detail Tile---
Now for a detail tile. Save your corner file, and load your wall file. Lets build some beams to support the cave mine.
http://i23.photobucket.com/albums/b353/MoondogWiz/tl_tut015.jpg
Create a box and shape and position it so it's going from the ground to the top of the wall.
http://i23.photobucket.com/albums/b353/MoondogWiz/tl_tut016.jpg
Texture applied.
http://i23.photobucket.com/albums/b353/MoondogWiz/tl_tut017.jpg
Then Create a top beam.
http://i23.photobucket.com/albums/b353/MoondogWiz/tl_tut018.jpg
Then last, two beams to support the top beam.
Now combine your beams all into one object. Save your file. Now simply export the floor tile as "mine_floor.x", the wall tile as "mine_wall.x", the beams as "mine_beams.x", and then load your corner file, and save the corner tile as "mine_corner.x"
Now with these 4 basic tiles, you can create simple level, and fast. You can easily create a lvl editor and position the tiles, or you can create a system where you place out an array of numbers the represent each tile in a text file, and load it in-game. Useing tiles, you can easily hide ones that are not on screen, or ghost ones that are obstructing your view of your character.
Hope this helps anyone trying to build huge dungeons easy and fast. I'll eventually add more to this tut, like building outer corner tiles, and even building complex tiles that no one can tell they are.

later
MOONDOG

current projects: Mystic Dream // red // battle room
