A lot of people around these boards have been asking on how to use alpha maps. Now, the answer is quite simple, and most people understand merely by having it described in words, lest they are nearly completly inexperienced with computer graphics in general.
To put it short, alpha maps are either embed or seperate greyscale pictures that define the level of transparency of a texture, with the brightest white being completly visible, and the darkest black rendering it invisible. All greyscales between define different levels of transparency, the darker it is, the more transparent it shows up as, evidently. This can provide much depth for textures, such as overlays for example. You could make an oil or blood stain to put around your level.
Now, I'm going to briefly guide you through an example showing how to make full alpha maps with semi-transparency for best rendering effect.
First of all, fire up whatever picture editing program you use (amongst the costy ones, I'd recommend Photoshop. If you don't have the money to buy it or don't have it available for use elsewhere, download a free tool like the GIMP or something similar) and load up the texture you want alpha-mapped/transparent.
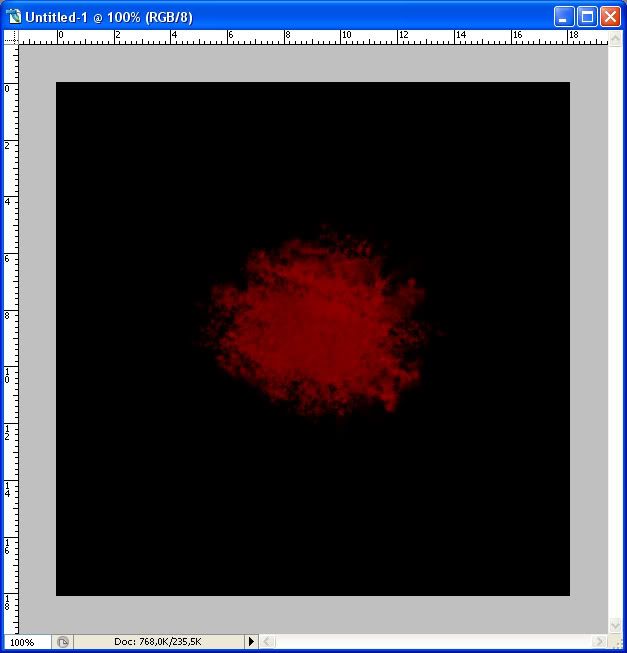
Here's what I'll use for this example, a nifty little blood-stain that I threw together using basic brushes and a few discrete effects;

Feel free to steal it, I'm gonna give it out for free in this thread soon anyhow so.

Anyways, now on to the alpha-mapping. For this bugger, I want the edges to smoothly blend into the texture, with the black parts not being visible at all. This is a quite simple procedure that doesn't always work with every texture, but it gets you started on how to do it, basically.
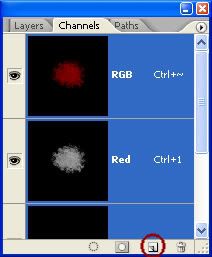
For a blood-stain, go into the channels tab and highlight the red layer.

This layer defines the level of red in the picture in greyscale, and all three channels combined makes an RGB-image.
This will show the texture in the 'red-defining' greyscale, which can be very well used as an alpha map as well. Select the entire layer, and copy the red-channel layer. Now, click on the button circled in red above to create a new channel (which will automatically be named Alpha 1) and paste the greyscale picture in.
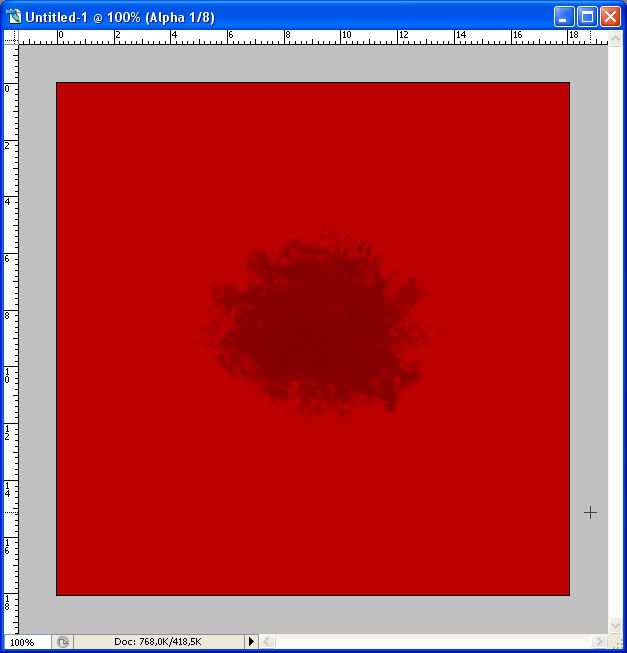
Now, we've actually got ourselves our alpha-map! Quite easy, huh? Yes, but there's more to it than that. You can change the brightness/contrast of the alpha channel to suit your needs, if you want a very distinct blood-stain that looks more dried, make it closer to black. If you want it to be brighter and more defined sort of, make it whiter to make it less transparent.
I made mine slightly brighter, for a more defined look. If you flag all channels as visible, you'll see that PS renders the transparent areas with shades of red, which is a bit unpractical when you're working with blood stains, but it is customizable, so you can change it to render the alpha as blue, green or whatever you'd like.

The stain does show quite good, even with the red shades. Through flagging the alpha channel on and off, you can study the transparency to see that it works as you want it to. It's quite easy once you've got the hang of it.
I assume that you'd like a little peek at the final result? Well, you'll have to wait for a short while then, as I don't want to risk losing this post because of the darn computer crashing when I'm running FPSC. My comp is very unstable, yesh.

So, screenshot of final result will be up in a few minutes, and that's that for this tutorial. If you get the hang of it from this method, then you'll easily be able to create alpha maps to suit your needs in no time at all.
PS. As for saving, either save your texture with alpha map in a 32-bit TGA-file, or with the DXT5-setting when saving as a DDS-file.
Hope this helps some lost forumers.

