One tip to keep in mind in terms of UV Mapping; don't worry about your UV's being symmetrical or perfectly alligned. Rotating your UVs to pack them as tight as possible allows you to scale them up, and obviously the bigger your UV map is for any polygon on the object, the more texture detail you can get in without having to use a really big texture size. For example you have a lot of blackspace around the spike-hands there that could be used if you rotated a few UVs around and scaled them up a bit.
Also consider changing the size of UV's based on their importance. The head usually requires a lot of detail to get the finer details into the skin, so you should try to keep the head bigger in comparison to most things.
Things like the ears however, don't really need to be that big, because in general its a simple texture on a small part of the mesh that wont often be looked at close up. You can then shrink the ear UV's and scale up other more important parts.
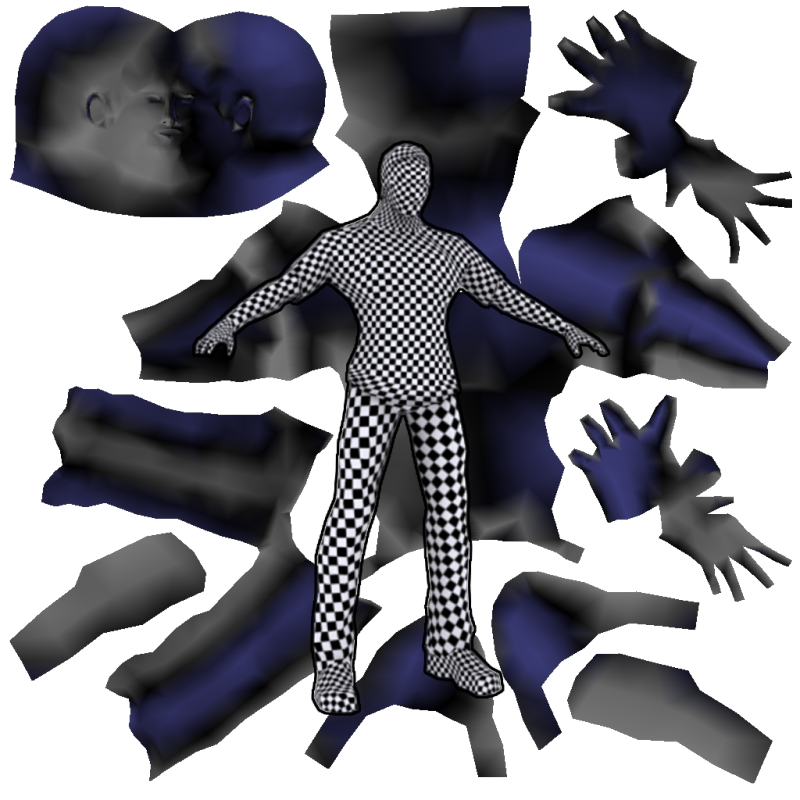
Last thing, is to use checkerboard textures! In max this is simple, open up the material editor, pick a new material, click the bitmap button and select the Checker material. Go down to the vertical and horizontal tiling settings and crank them up a bit (depends on your mesh size). Apply the texture to your mapped model, and look for parts of the model that have squares that appear more rectangular or deformed rather than actual "squares". These are portions that you should look into remapping or moving UV coordinates around. Its near impossible to never get any stretching, but you can usually get close. Less stretching means the texture you create in photoshop will show up as you expect it when you apply it to the mesh.
Here's an old human I did, notice how pretty much every square IS "square":

The UV Map is in the background, also notice how I've rotated parts to make them fit better and use as much of the UV space as I could (within reason).
If you really want to see some well-done UV maps, google images for the uv maps for Unreal Tournament characters. They're almost always really well done.
<edit>
One last thing. If you aren't familiar with Pelt mapping, its one of 3DS Maxes most powerful UV Mapping techniques, and almost always ends up with a UV map with little to no stretching right from the beginning. Theres plenty of tutorials on youtube demonstrating how to do pelt maps, I really recommend looking into it.