Building a fully configurable Windows installer for free.
I spent the last few days testing around a dozen free installer builder solutions (yes there are that many) and I thought it might be useful to share my findings with the community.
Background: I am creating a silent installer which runs a utility service after install. There are activities in the registry and task scheduler created by the service that needed to be removed on uninstall. I also needed to stop the service on uninstall if it was running. As a side mission I decided to find the builder I thought would be easiest and / or best for building game installers.
Conclusions: There were a number of free solutions that would be great for general usage, particularly for games such as those built by AGK. I found the best simple solution was
Advanced Installer. It was possible to build an attractive and professional installer for free and it was easy to learn.
The main difficulty with using the free "Wizard" solutions such as Advanced Installer was that it was impossible to do anything "clever" behind the scenes. The job I was working on I needed a silent installer, a few of the free solutions could do this (including Advanced Installer) but none of them would allow me to run the executable after a silent install. It was also impossible to edit registry items or remove scheduled tasks on uninstall without paying for the full version. I started to look at scriptable systems and quickly ended up fiddling with
NSIS from Nullsoft. The scripting system is not very easy to learn using Nullsoft's own documents but I soon found that there was a
plugin for the Eclipse IDE.
The plugin for Eclipse is really fantastic, you can use a wizard to configure the vast majority of the installer scripts in a simple wizard. Once you've built this you can edit the script using the Eclipse interface. It has keyword highlighting and a command list. NSIS also has a bunch of useful plugins that Eclipse detects automatically once installed.
I was soon able to add/remove registry entries and scheduled tasks easily in both the installer and uninstaller script.
The learning curve for NSIS in Eclipse is pretty shallow and well worth the time if you plan on releasing on Windows. If you already have Eclipse installed for Android development it is even easier.
A professional installer adds credibility to your game and allows you to be more involved in the user's installation experience and what actually happens on a user's machine when your game is installed. It may be easier to use a quick to learn Wizard but a full system such as the plugin for NSIS on Eclipse can save you from "upgrading" for hundreds or even thousands of pounds later to achieve the same professional results.
How do I install it?
1-Start by installing NSIS from this link (make sure you choose the
-32Bit-/
-64Bit- version):
DOWNLOAD NSIS
2-Next install Eclipse. I found that the most compatible version was
version 4.2:
-32Bit-
-64Bit-
3-Install the NSIS plugin for eclipse.
a-Open Eclipse (if you have a problem with the JVM make sure you have the
java runtime environment installed on your machine).
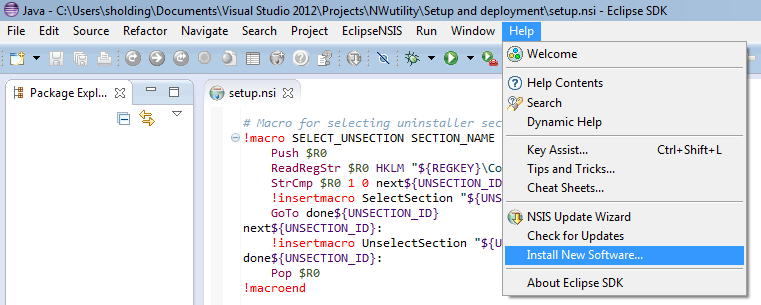
b-From the main menu select "Help->Install New Software..."

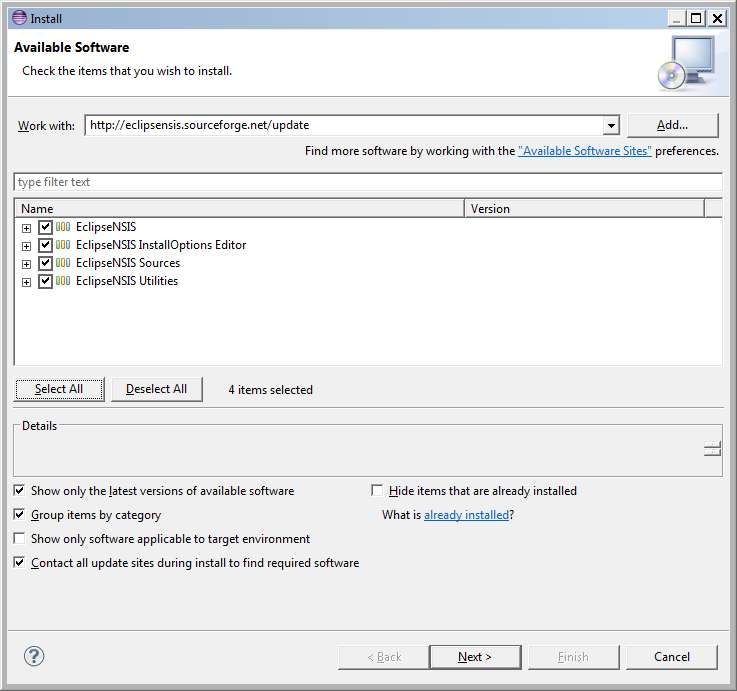
c-Copy this address into the "Work With:" editbox at the top: http://eclipsensis.sourceforge.net/update

d-Select all and click "Next" to install the plugin
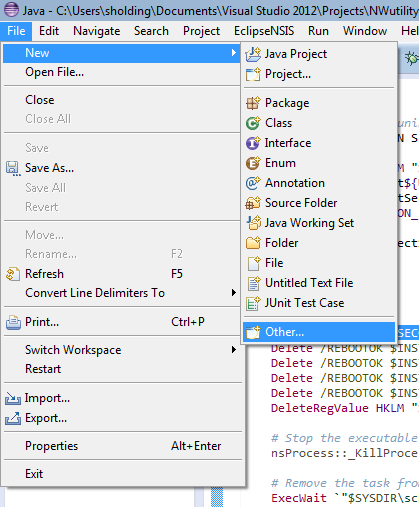
Now the wizard is available in Eclipse from the "File->New->Other" menu.

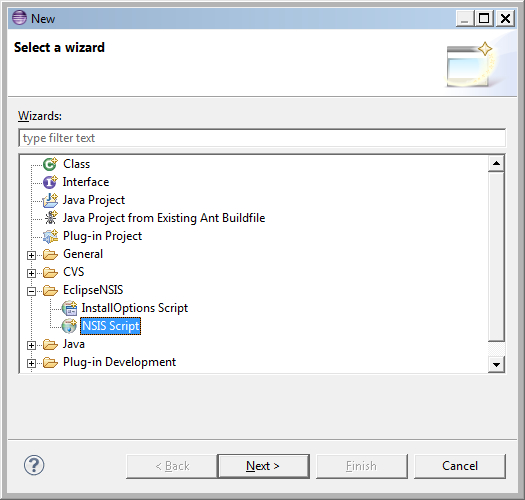
You will find it here in the "Wizard" dialog:

Different does not mean not equal: a = b
