Hi guys.
Here is a tutorial to export a 3D object or animation from blender to agk.
Note : other screenshots will be added soon

(My orginal post (from my blog) can be translated in lots of langage ) :
https://arkeoschronicle.wordpress.com/2018/02/25/blender-to-agk/
1) create or import 3D object in the blender ( version 2.7x).
- Do not have too many faces (for a character between 500 and 3000 approximately), if necessary, reduce the number of faces.
Edit mode :
- to edit your object3D, reduce the number of faces...
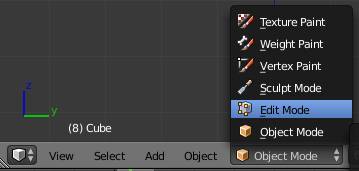
- clic on your object 3D, and use the Tab key to enter in editmode or use this menu :
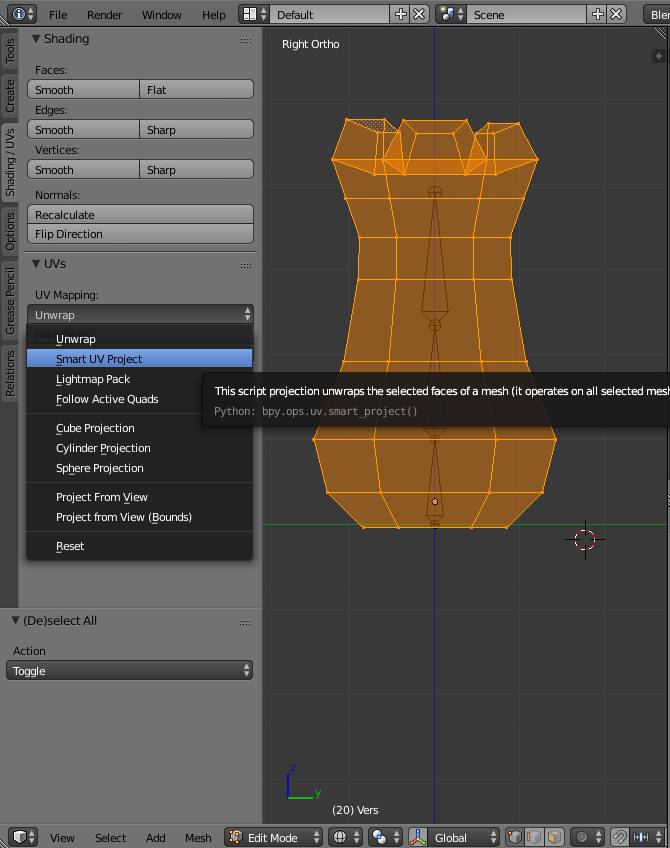
- Achieving proper uvmapping. Unfold uv: in edit mode, panel tool / uv tools, use unwrapp. If necessary, edit the uv mapping, to avoid having faces that overlap.
Uv window (from editor type) :
Choose the UV/Image editor
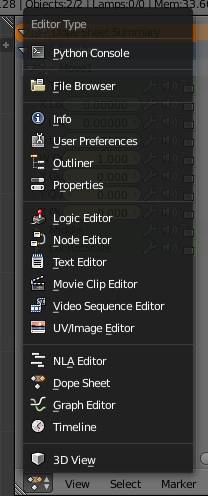
Unwrap (uvmapping of the 3D object) :
Result of the uvmapping (here, some face are overlapped)
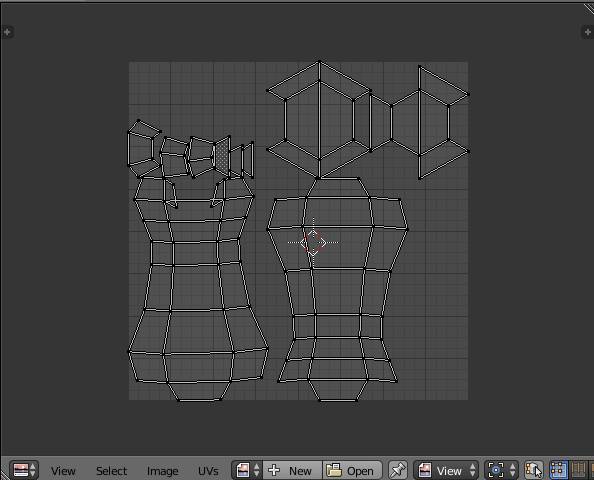
Uvmapping ok :
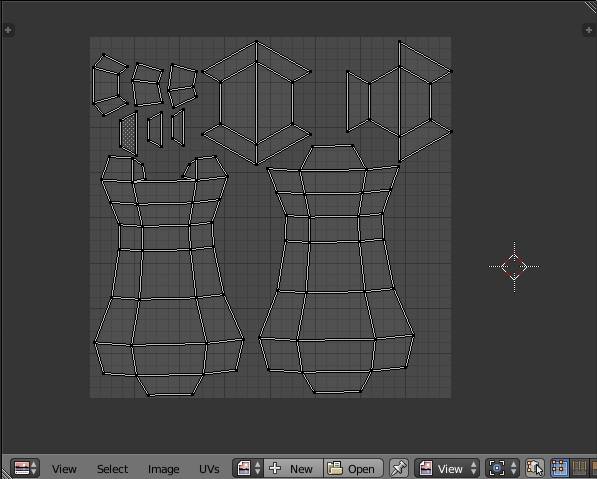
- Create texture : you can paint on the model, including pictures, or use the tool 'bake' in the render panel at the bottom.
texture paint mode :

baking :
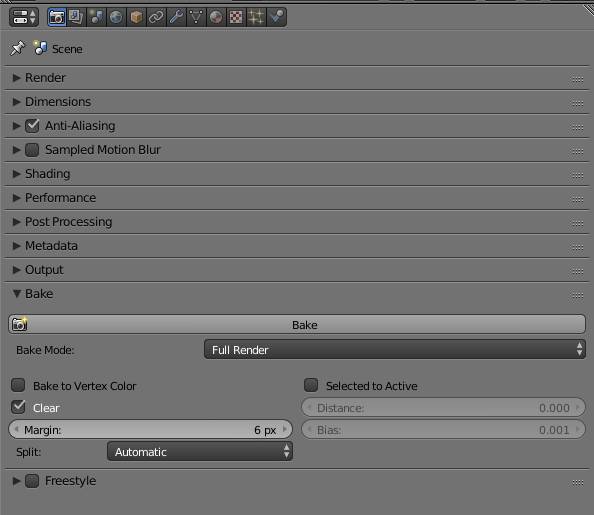
- If your object is not animated, go directly to 3) export the model
2) Animation in Blender
This is a delicate stage. Agk can import various formats: .dae, .x are two formats that seem the best. However, agk does not support scales.
So be especially careful never to use them in blender. Otherwise, you may need to convert the model with a 3D conversion tool like Ultimate unwrapp 3d (about 60 €) or open3dmodel (free and open source).
Warning :
- before creating the skeleton/armature, check out the size of your model, if necessary, export in .obj and test its size in agk. Scale the model in edit mode and not in object mode. If not, then you should apply the scale with ctrl + a / apply scale.
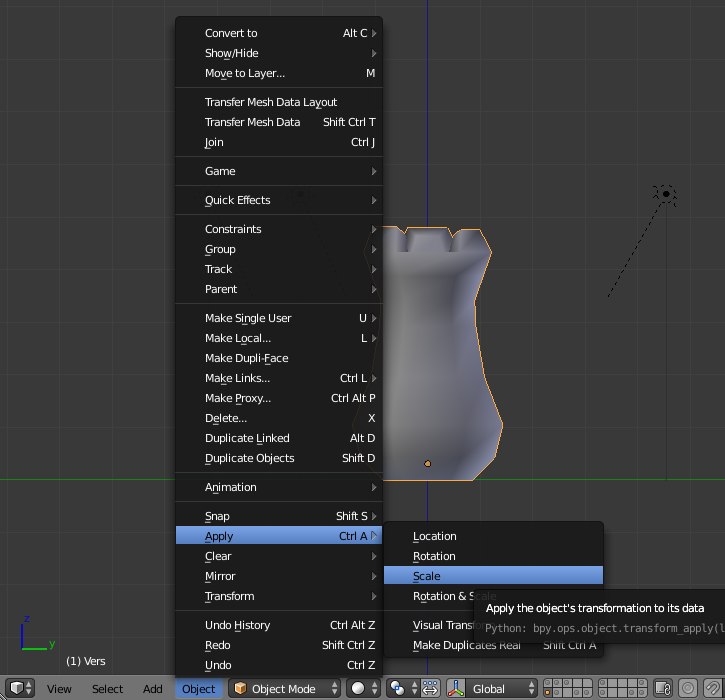
- Put your model in the center of the view, ditto for the skeleton. Because when exporting, this will be the pivot of the object.
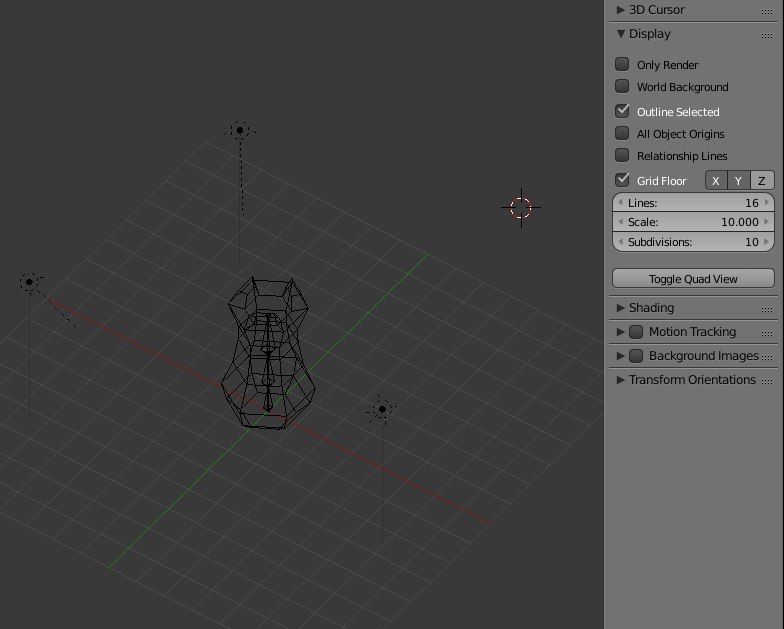 For the animation in Blender:
- Create the skeleton, creating the bones by hand. It is unfortunately not possible to use rigify because of scales on it.
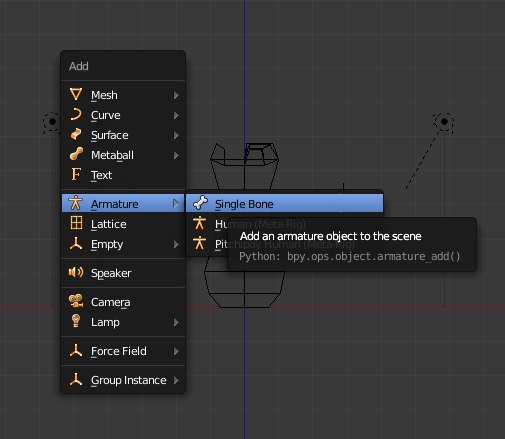
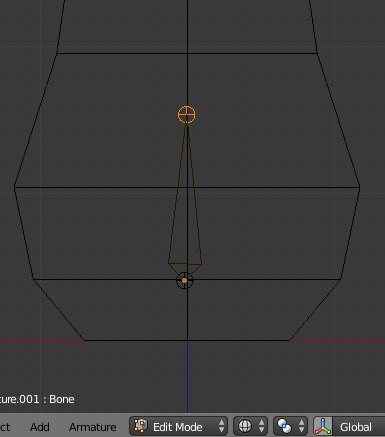
- To enlarge a bone, do not use the scale, but pull the head of the bone, for example.
- It seems we can not use inverse kinematics (IK solver) or other modifiers of bones, otherwise it fits the scale of the frame.
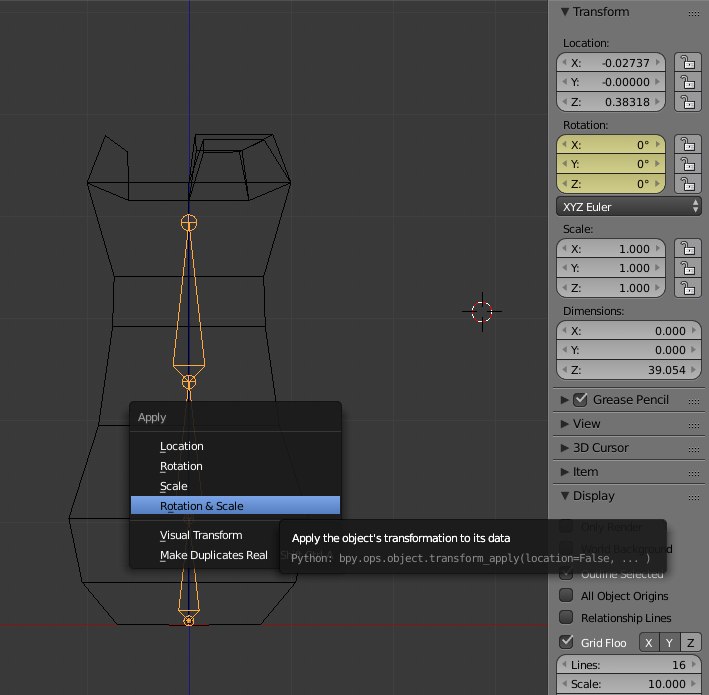
- Once in place, before to parent the 3d model with skeleton, apply scale for the armature (and even rotation if necessary).
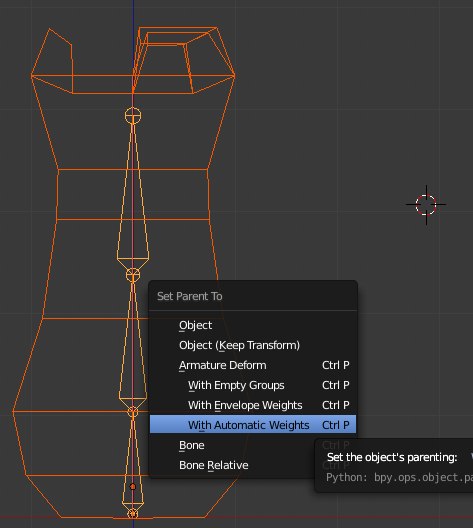
- To parent the 3d model with skeleton, select the 3D model and the skeleton then press ctrl + p, choose automatic weight if possible, or use envelope.
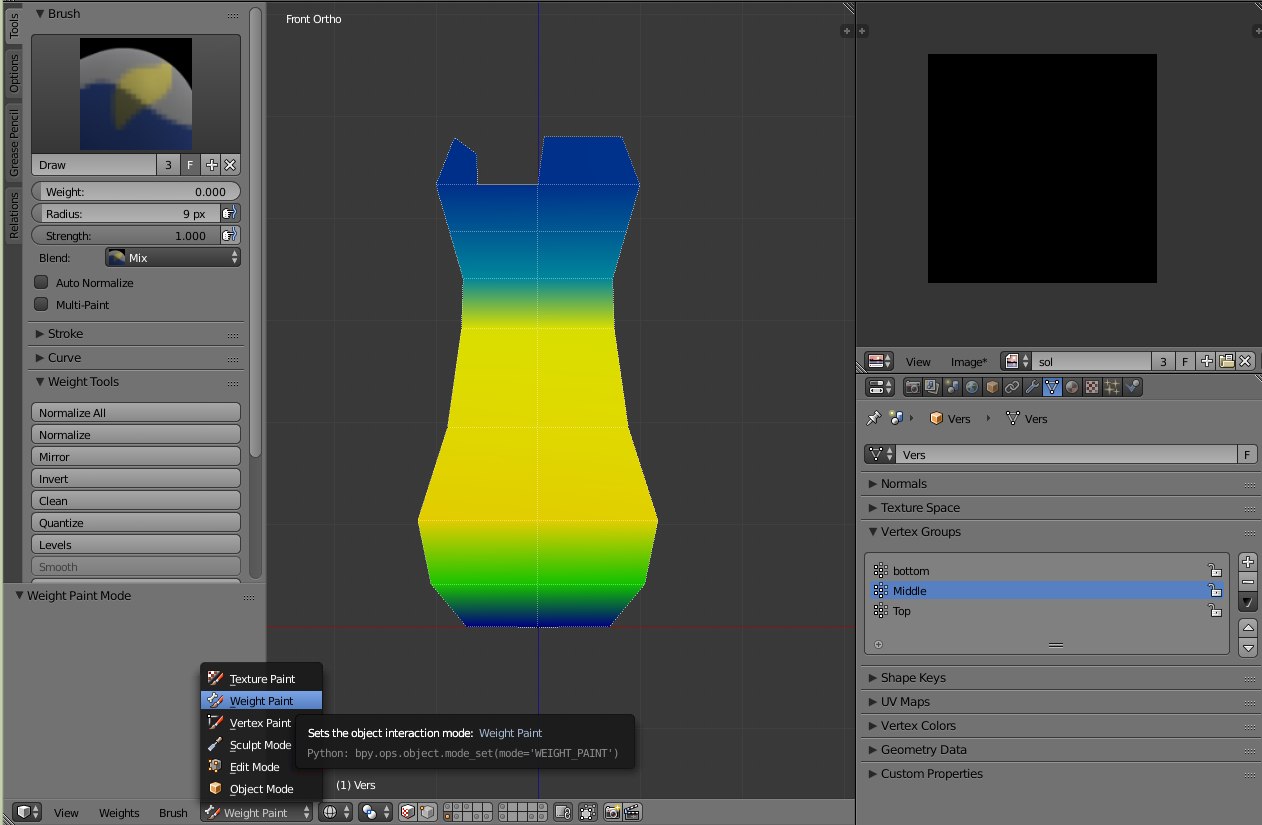
- If necessary, change the weight painting to make everything okay. Select the 3d model, and enter weight paint mode and select each vertex group, and then change the weight in the left panel (t key).
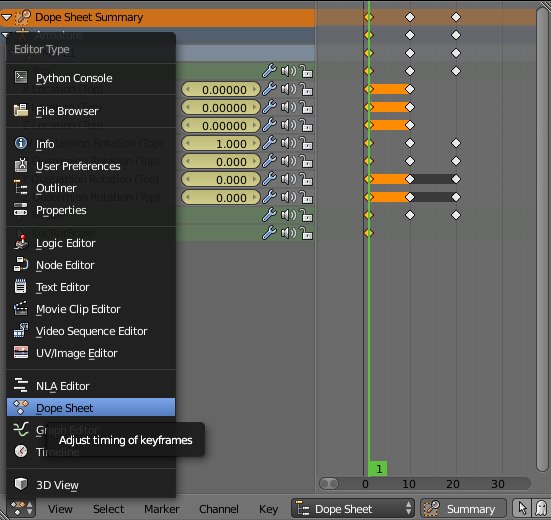
- When it's ok, we can animate. Open dopesheet screen, to access the animation keys if necessary. Warning: use only one action for all your animations as blender exports only the first action (export in .dae)
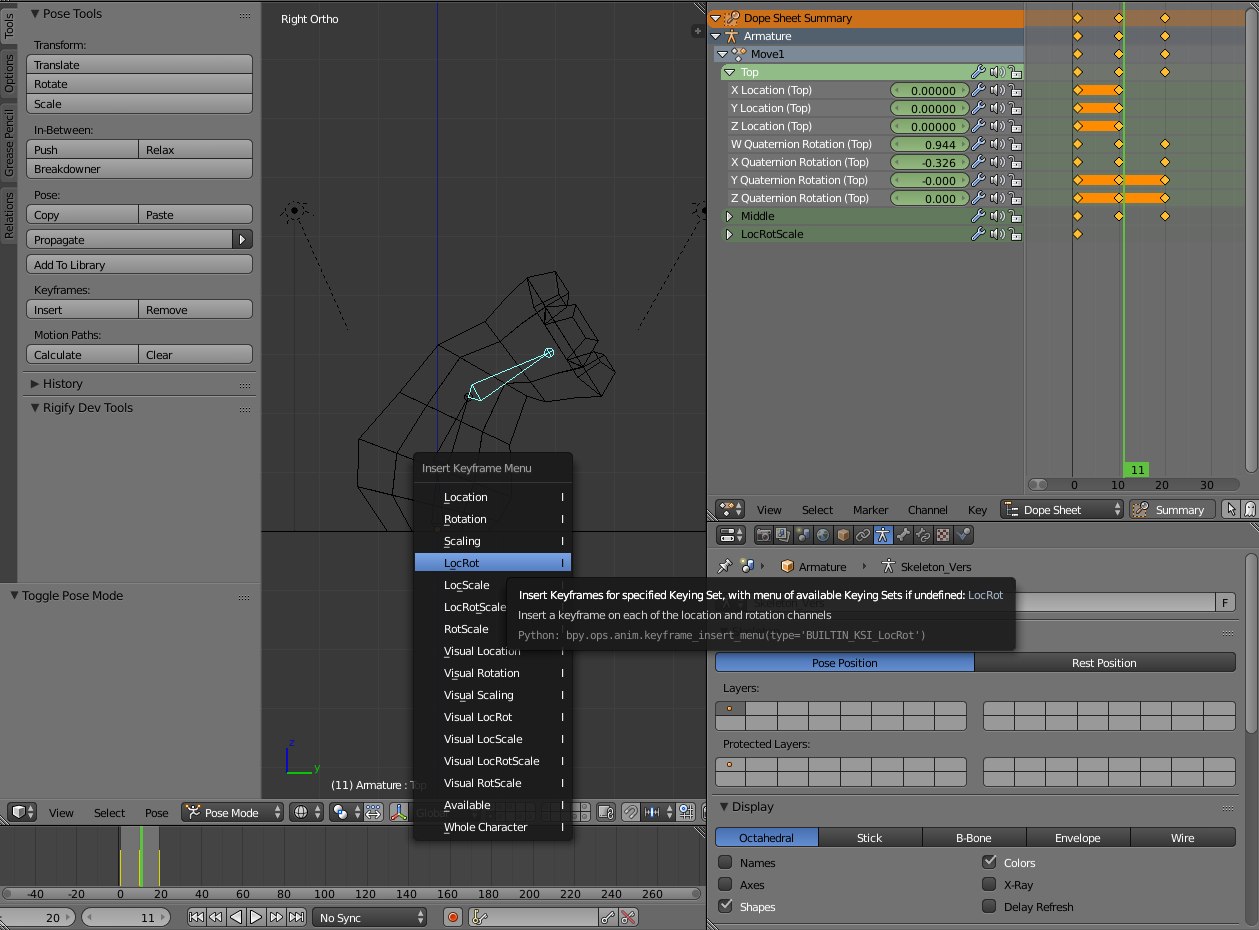
- Then animate your model by moving the bones or doing rotations, never scale! Moving a bone and press the i button to insert a key, choose LocRot.
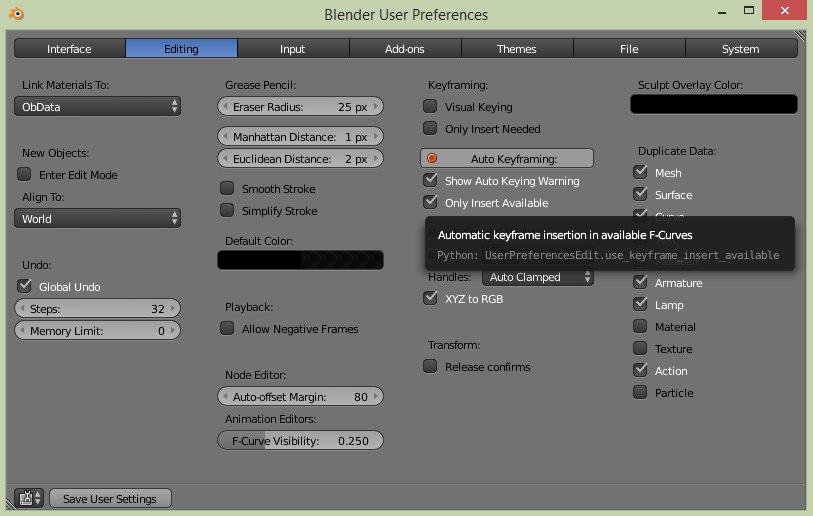
- It is possible to activate the autokey. You can choose to insert for LocRot channels only.
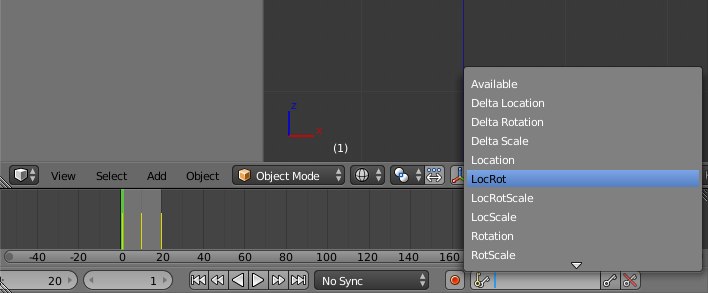
- in user preferences,
pay attention to check the "only channel available", never insert scale.
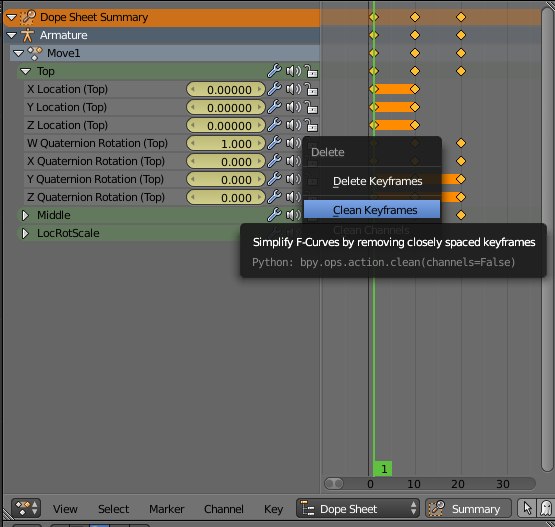
- When your animation is complete, you will be able to export. You can clean some channels in the dopesheet screen. Select all the keys and press x, select "clean channels".
 3) export to agk
Your 3D object and animation are ready. You can export:
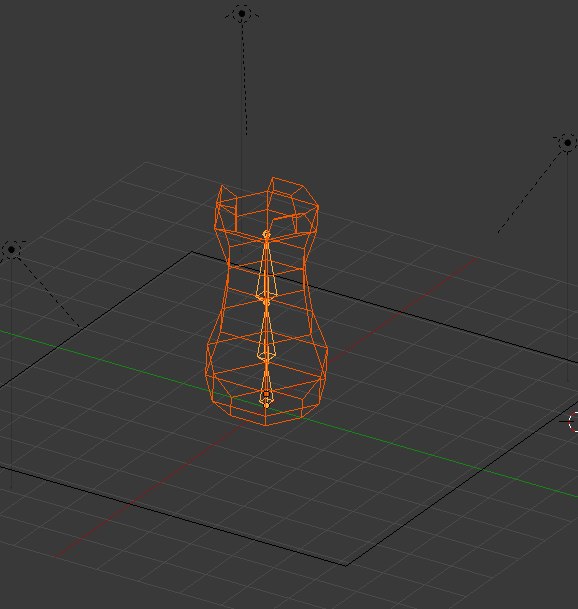
- Check that the 3d model and skeleton are at the center of the view.

- Select the 3d model and the skeleton, if an animated object.
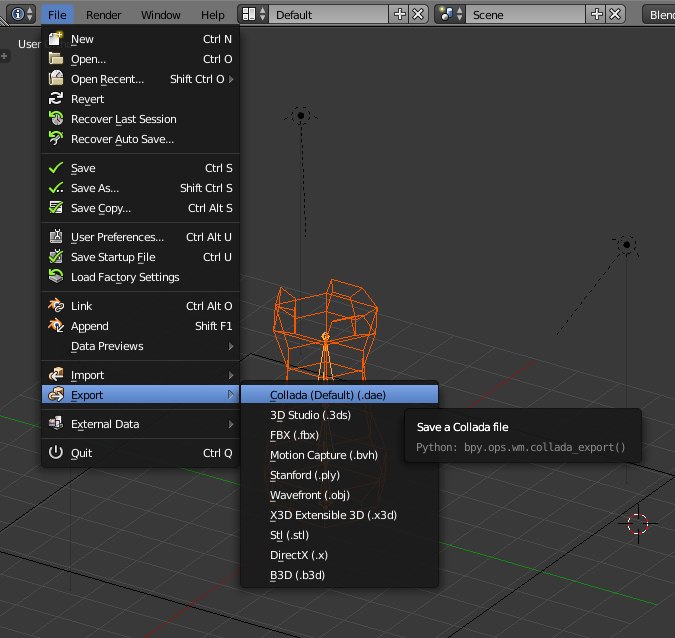
- Menu file / export: animation, choose Collada (dae) or .x. For a normal object, the .obj, .x or another should work.
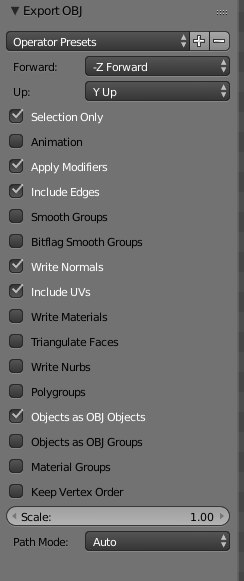
- Export .obj : Apply Modifiers, Include Edges, Include Normals, Include UV, Objects objects as OBJ
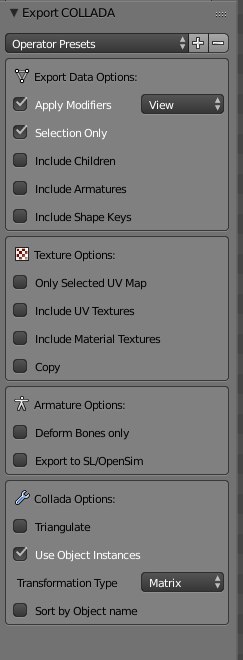
- Export .dae : Apply modifiers, selection only, triangulate.
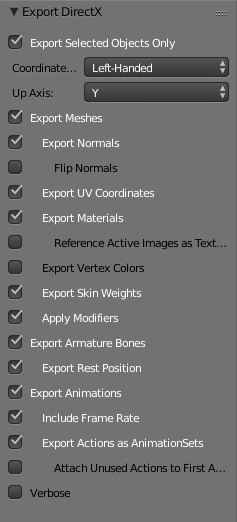
- Export .x : export meshes, normals, uv coordinnates, export skin weights, amatures bones, rest position, animation, animation as animations.
 4) import the 3d model in agk
- For an animated Object (or multi object): Use LoadObjectwithchildren ().
- Use the "frames" for your animation, but must be converted to time (seconds...).
Important : in AppGameKit, if you have several animations in your object animated, you should use the time for each animation
For example, in blender, you should have:
10 for Animations of 20 frames : walk, run, die, etc...
- frame 0 to 20: Walk
- frame 21 to 40: run
- frame 41 to 60: die
and so ...
Total frames : 200 frames
Remember :
- the start frame for the 1rst animation : 0
- the end frame of the 1rst animation : 20
- The total of frame in your model : 200
In AppGameKit, you should use :
PlayObjectAnimation( objID, animName, starttime, endtime, loop, tweentime )
exemple with the 1rst animation (walk)
- starttime : it's the start time for your 1rst animation
- endtime : it's the end of your animation
How to calcul the starttime and endtime of animation ?
- StartTime = StartFrame / TotalFrame
- Endtime = EndFrame/ TotalFrame
So for the walk animation :
- start frame = 0 -> Starttime = 0/200 (= 0)
- Endframe = 20 -> Endtime = 20/200 (= 0.1)
So in aGK, you should use (to see the first animation (walk)) :
PlayObjectAnimation (objid, "", 0, 0.1, 1, 0)
or
PlayObjectAnimation (objid, "", 0, 20/200, 1, 0)
For the others animations :
- walk : startTime = 0/200, endtime = 20/200 (or 0.1) : PlayObjectAnimation (objid, ' ", 0, 20/200, 1, 0)
- Run : startTime = 21/200, endtime = 40/200 (or 0.2) : PlayObjectAnimation (objid, "" , 21/200, 40/200, 1, 0)
- die : startTime = 41/200, endtime = 60/200 (or 0.3) : PlayObjectAnimation (objid, "" , 41 / 200, 60/200, 1, 0)
and so.
NOTE:
- in blender, you can see the animation in frame or in time if you prefer

Et voilà !
Other usefull threads (blender to agk, or animation 3d for agk):
Blender to agk :
https://forum.thegamecreators.com/thread/215998
https://forum.thegamecreators.com/thread/220581
https://forum.thegamecreators.com/thread/219381
https://forum.thegamecreators.com/thread/204256
https://forum.thegamecreators.com/thread/219381
Misc :
https://forum.thegamecreators.com/thread/217019
https://forum.thegamecreators.com/thread/221082
https://forum.thegamecreators.com/thread/219376
Dae error :
https://forum.thegamecreators.com/thread/215791
Cheers !

Edit 03.2023 :
- Changes the images links with github links (https)
- Add More informations to export animation for AGK.
AGK2 tier1 - http://www.dracaena-studio.com