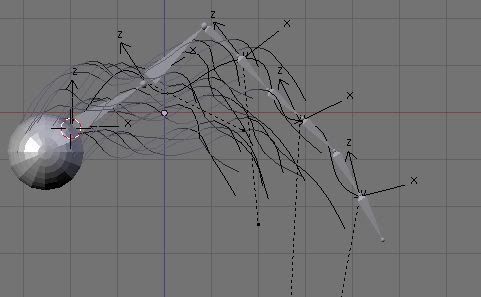
For those of you who are curious how you would go about manually animating hair in blender(as opposed to using wind), Its all about Hooks, a tool I just learned how to use.
Fire up blender, and add a bezier curve. This will be the curve guide for your hair. You can set it as 'curve guide' in the physics buttons. Go into edit mode, and add as many control points as you need for the hair, for now just try having 3 control points total(meaning you only add 1). Arrange them however you like. Now, select the first control point, and press ctrl-H. This brings up the Hook menu. Select Add, to New Empty. You will see an Empty appear on the vertex. If you move the empty, the vertex will move as well! Handy isn't it. Now add a Hook Empty to the 2 remaining curve vertices. When you are finished, you should have a bezier curve with an empty attached to each vertex of the curve. This is good, but we need more control! Add an armature starting at the first vertex of the curve. Make a bone for each curve vertex. Now Parent each Empty to the bone that its closest to, and you can control the curve with the armature! For even better results, toggle on "Automatic IK". Then just use that wherever you have hair that you need manual control of. Here is what mine looks like I used more control points so it looks a bit more complicated than yours will be( i have only 20 strands of hair to increase visiblity of the curve, armature and empties):

Im sick of Master Chief soo...ooga booga!!
Explain to me why some people pay money for 3d software? Its not 3d till its been blended. wwww.blender3d.org
