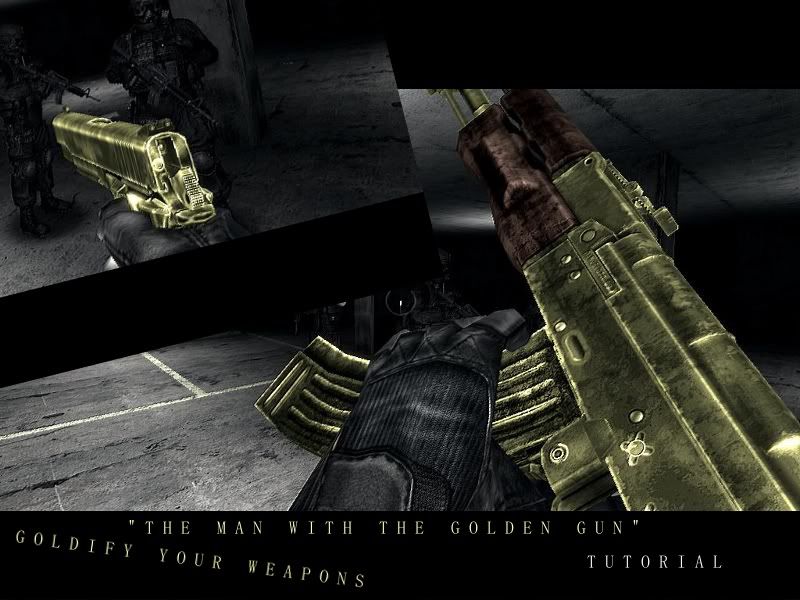
 Gold Weapons Retexturing Tutorial
by Kravenwolf
Gold Weapons Retexturing Tutorial
by Kravenwolf
1. Open the gamecore/guns folder and navigate to the specific folder for the weapon you want to goldify. Before you get started, first make a copy of the original _D and _D2 textures for the weapon. These original files will come in handy when you get tired of your new gold plating, and want to scrape it off. Open one of the copied _D or _D2 texture files in GIMP.

2. Using the
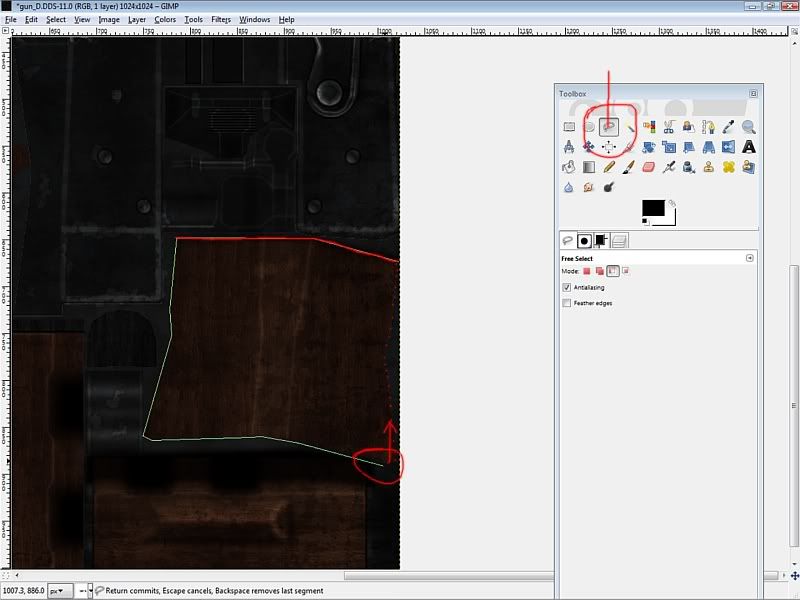
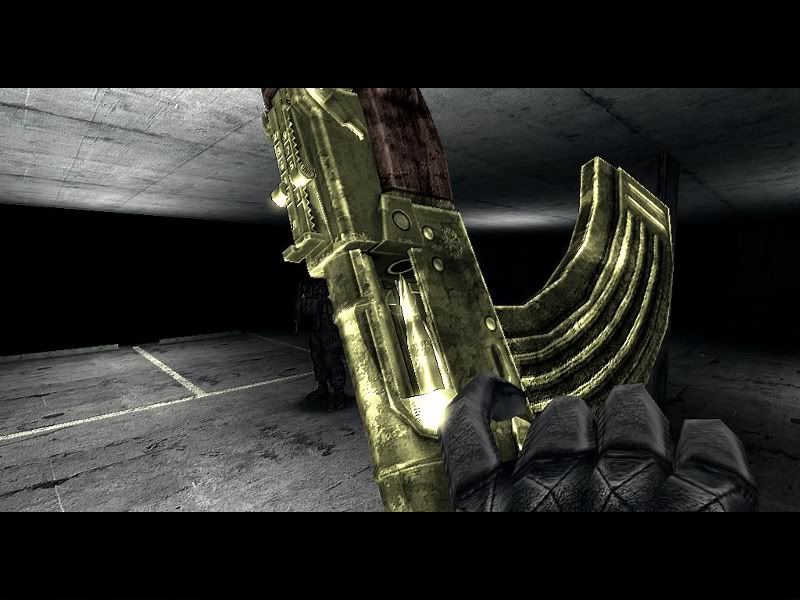
FREE SELECT TOOL as indicated in the toolbox, trace the outline of the parts of the weapon that you want to leave as they are (in this example, the wood accents on the AK47).
To use the
FREE SELECT TOOL; once you have it selected from the toolbox menu,
LEFT-CLICK on one of the edges of the texture area you want to exclude and drag the mouse along and up to the first part of the outline that comes to an angle/curve.
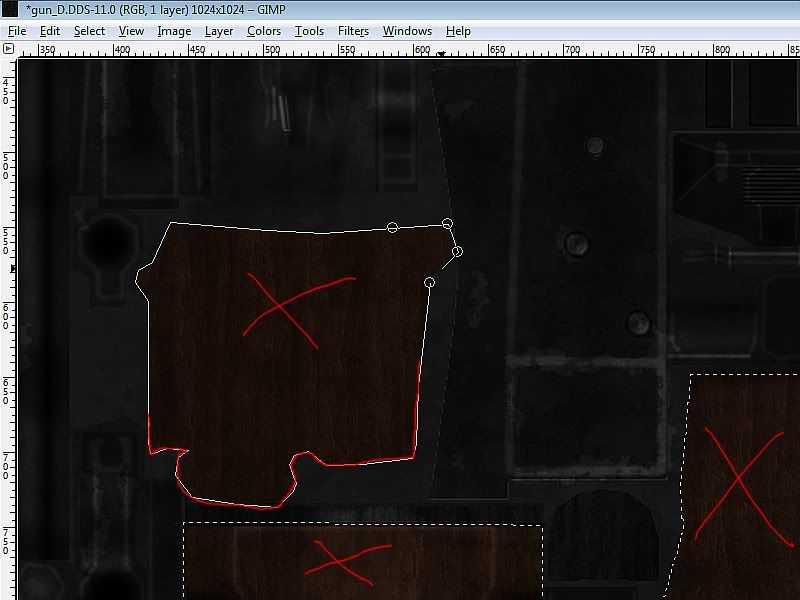
LEFT-CLICK again to set that line in place. Now, drag the mouse again and a second line will follow the first one. Once you have this new line drawn along the outline,
LEFT-CLICK again to set that line in place. Repeat this process until you've outlined the entire figure. Once you return to your original starting position having traced all the way around the outline, press the
ENTER key to close the selected region.
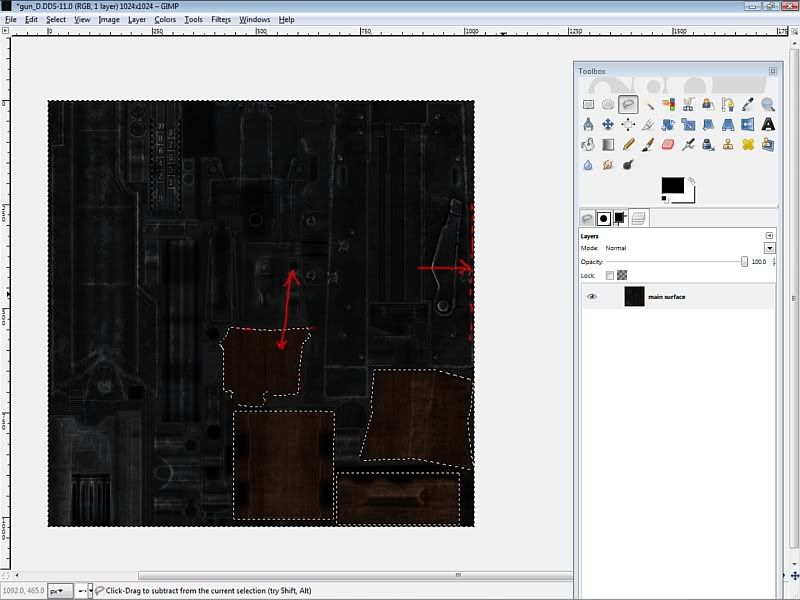
3. If there is more than one area on the texture you want to exclude from the gold modification, repeat the same process as you did for the first area with the
FREE SELECT TOOL. Only this time, you'll need to hold the
SHIFT key down during the entire process, or else your previous outline will be erased. If you make a mistake, you can press Crtl + Z at any time to undo your actions; this includes reselecting your first outlined texture area.
4. Once you've finished mapping off the parts of the texture you want to exclude from the retexture, you'll need to invert your selection so the rest of the texture is selected for modification. With the outlines you drew earlier still visible, press
Ctrl + I to invert your selection.
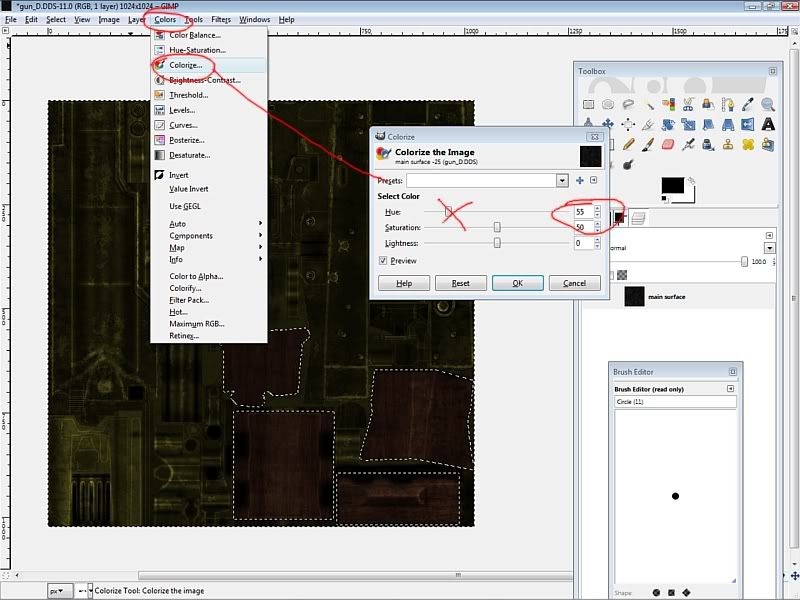
5. Now you're ready to transform the texture's metal into gold. In the
COLORS tab at the top of the program, chose
COLORIZE from the drop-down menu. Adjust the
HUE SLIDER until your texture in the background develops a nice yellowish-gold tint. Press
OK to save your changes. Remember, you can press
Ctrl + Z at any time to undo your changes.
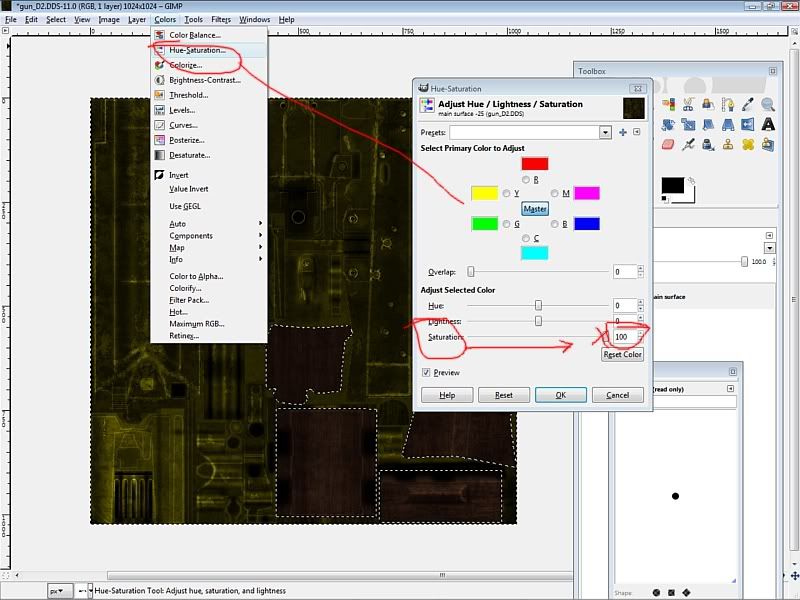
6. Again, in the
COLORS tab at the top of the page, this time select the
HUE-SATURATION option. Turn the
SATURATION SLIDER up to increase the brightness of your gold color without fading the texture. Press
OK to save your changes. Remember, you can press
Ctrl + Z at any time to undo your changes.
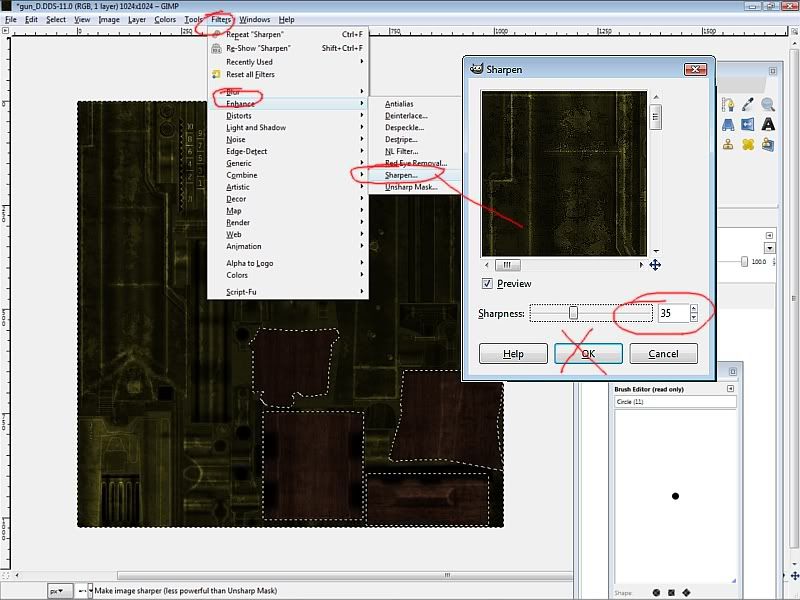
7. If you like, you can increase the sharpness of the texture by finding the sharpness filter in the
FILTERS tab at the top of the program window.
FILTERS >
ENHANCE >
SHARPEN.
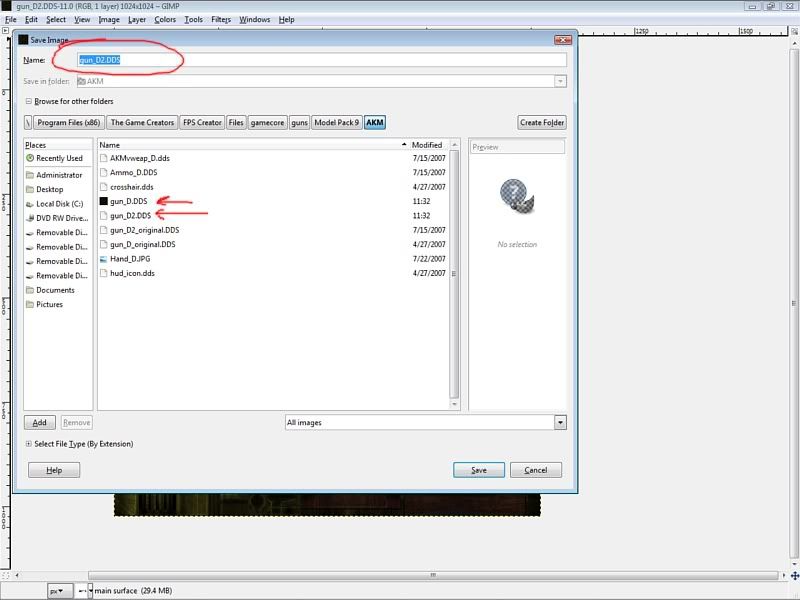
8.
SAVE your modified textured in the same gamecore folder as the original weapon's textures, with the _D and _D2 extentions.
9. In the same gamecore folder, find the
AMMO_D.DDS texture and repeat the same process starting with saving a copy of the original to saving the modified gold version.

That's it! You're done! If everything was done correctly, your player weapon will now have a sharp, fresh, gold-plated makeover!
NOTE: At this stage, the pickup weapon entity and pickup weapon ammo entity(s) remain their original colors. You'll need to run those entity(s) textures through the same process if you want the pick up objects to match their gold player weapon counterparts.
Hopefully, this tutorial isn't too hard to follow, and will come in handy for a few people. Any questions, post them here!
Kravenwolf
